A Step-by-Step Guide on How to Tarp a Roof

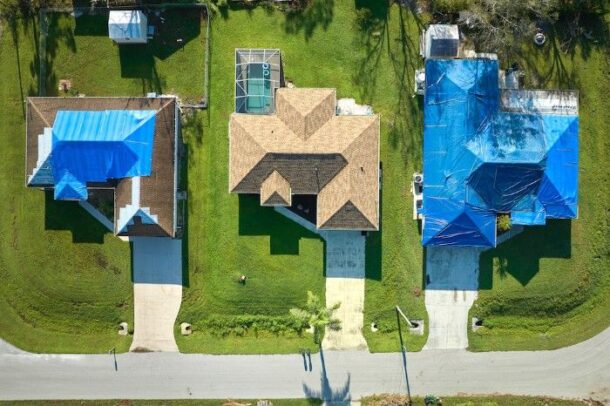
Your home’s safety should always be your top priority, especially after a storm or when dealing with a leaky roof. Knowing how to tarp a roof is one of the most crucial skills to learn to help safeguard your home from water damage. However, for it to be effective, it has to be done right until you can access a more permanent roof repair solution.
In this step-by-step guide, we’ll walk you through the process of safely and effectively tarping a roof to help you protect your house and belongings. Knowing how to tarp a roof correctly can save your home from thousands of dollars worth of water damage, so be sure to take notes!
Because tarping a roof can be dangerous, we recommend you ask others for help. Please don’t attempt to do it alone! If you are uncomfortable with heights or need clarification about the process, get assistance from a certified professional (who’s had proper safety training). Your safety matters!

Materials and Tools Needed:
- Tarp. Select a waterproof, heavy-duty tarp large enough to cover the damaged area with a few metres of overlap on all sides.
- Cap Nails. Choose nails appropriate for your roof type: roofing nails or galvanized nails.
- Wooden Boards. These will be used to help keep the tarp in place.
- Hammer. Ensure you have a suitable hammer for driving the nails securely.
- Ladder. Use a sturdy ladder that is tall enough to reach the roof safely.
- Safety Gear. Wear non-slip shoes, safety glasses, gloves, and a harness or safety rope if working on a steep roof.
Step 1: Safety First
- Prioritize safety by using and wearing appropriate safety equipment and gear, including non-slip shoes, safety glasses, and gloves.
- Set a ladder on stable ground and ensure it is securely positioned before climbing. You should always have another person assist you; tarping a roof is not a one-person job.
Step 2: Assess the Damage and Prepare the Tarp
- Inspect the roof to identify the damaged area and assess the extent of the damage. Remove any broken shingles and debris. If there are any holes due to missing shingles, cover them with plywood at least a few centimetres thick to prevent water from pooling once the tarp is down.
- Measure the damaged section and choose an adequately sized tarp to cover the damaged area. It’s fine to have some overlap.

Step 3: Positioning the Tarp
- Once you are on the roof, unfold the tarp and gradually position it over the damaged section of the roof.
- Ensure the tarp extends at least one metre beyond the damaged area on all sides to prevent water seepage. Have another person assist in unfolding the tarp so it fits well.
Step 4: Securing the Tarp
- You may use bungee cords, rope, or sandbags to secure the tarp in place as a temporary fix.
- For a sturdier placement, create an anchor board on the peak side of your roof using a wooden board, then nail the tarp to the board using cap nails. Use nails long enough to penetrate the tarp, the board, the shingle, and the roof decking.
- Once the tarp is secure, stack an additional wooden board on top of the first and secure it with nails. Doing so ensures the tarp remains taut over the damaged roof.
- Attach any excess tarp hanging out over the roof peak to the side of the house, just under the eave. This allows water to roll off the roof tarps without pooling it underneath.

Step 5: Regular Inspection and Monitoring
- Periodically inspect the tarp, especially after storms or heavy rainfall, to ensure it remains securely fastened and intact.
- If you notice any damage or notice the tarp shifting, take immediate action to reinforce or replace it.
Knowing how to tarp a roof offers a secure and reliable temporary method to protect your home until permanent repairs are made. With this handy guide, you can effectively tarp your roof and minimize the risks of a leaky roof and possible water dam. Remember to prioritize safety throughout the process and seek professional assistance from a roofing contractor if you cannot do it alone.
Call PuroClean Restoration Richmond BC for All Your Property Damage Remediation Needs
When it comes to property damage, get assistance from a professional team of specialists like PuroClean Restoration Richmond BC to mitigate the situation effectively. Whether it’s water damage, fire and smoke damage, or mould remediation, our team has the knowledge, experience, and equipment to handle the job efficiently. We provide reliable, high-quality services to restore your property to its pre-damaged condition. Don’t hesitate to call us today at (604) 841-9879 to let our experts take care of your property damage needs.


